
So do you have a passion or interest that you know a lot about? Do your friends or family come to often for help or advice on a certain topic?
A blog may be perfect for you to share your knowledge with the world, gain a loyal following, and even make some extra cash with (or even a full or part time income!).
We started this blog around 6 years ago because we wanted to easily share our experience as an international couple. It eventually morphed into a blog to easily learn basic Korean words and we really enjoy doing it.
Starting a blog may be daunting at first, but it’s actually very simple and easy to setup.
Here, we will guide you with 3 simple and easy steps to get you up and running.
So let’s start!
The 3 steps to starting a blog:
- Getting a domain name and hosting
- Installing WordPress
- Choosing the design of your site and making it look nice
#1. Domain name & Hosting
So if you’re not already familiar with what a domain name is, it’s basically choosing an address for your site. You know how you type in www.sitenamehere.com? The words in between www and com are your domain name.
Whatever niche you’ve decided to blog about, your domain name should reflect that (in most cases). It should be catchy, yet simple and easy to remember. Making a long domain name will make it difficult for people to remember.
Now keep in mind that although domain names are pretty cheap, you want to choose a good one right off the bat. Changing it later is possible, but it’s really annoying to do and can affect your traffic later down the line.
So make sure you spend a little time choosing a good name. Don’t be afraid to brainstorm ideas for a few days.
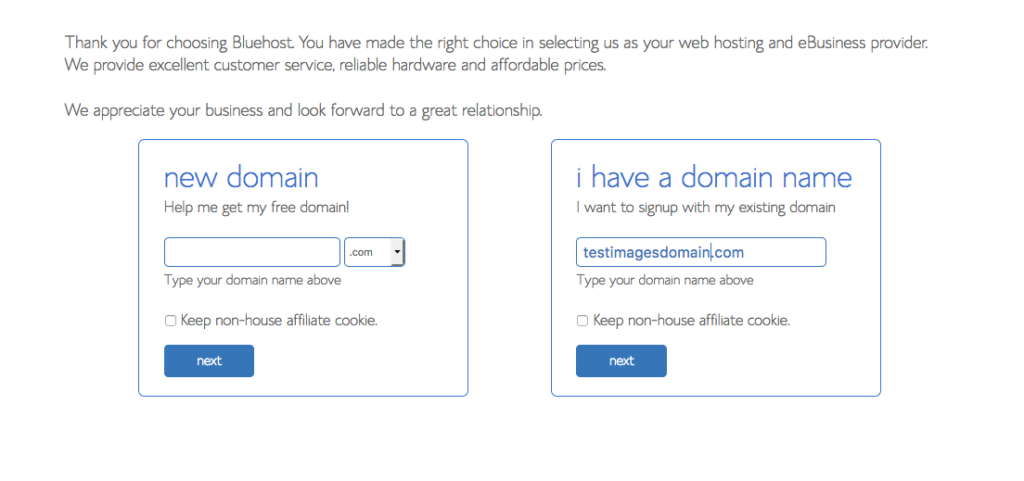
Once you think you have settled on a good domain name, head on over to Bluehost and check to see if your domain has been taken first. The page should look like this:
Next, you will be asked to choose a plan. We have used Bluehost for the past 3 years because of the ease of integration with WordPress, great features, but more importantly, the cheap price!
There are 3 plans offered:
- Starter
- Plus
- Business Pro
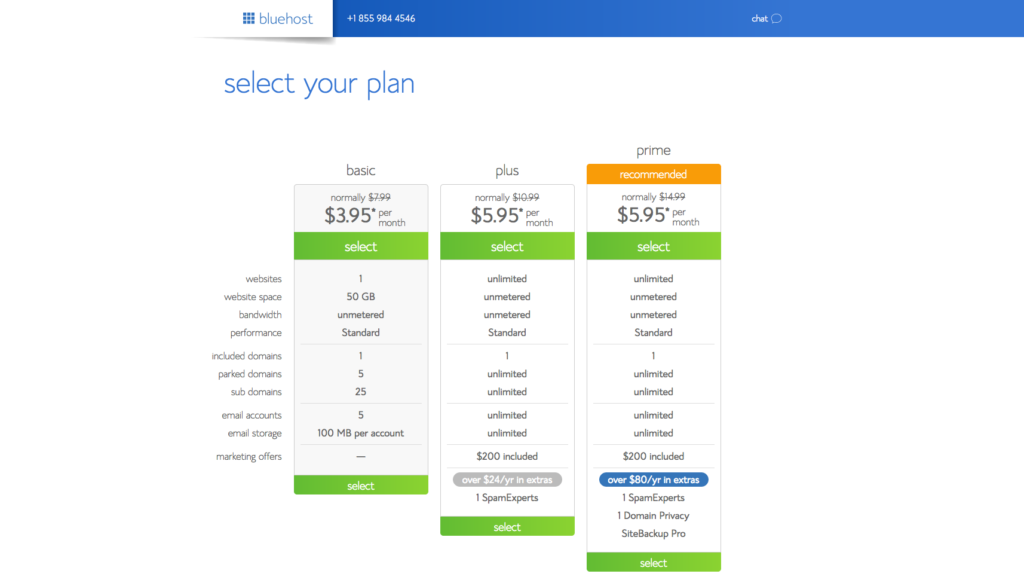
Since you are just starting out, the Starter Plan will be perfect. Now keep in mind, this will be paid in one lump sum, but will save you money in the long run and you won’t have to worry about renewing your site every month.
For example, (and this happened to me) I had a monthly renewal plan with another site in the past, and the credit card expired and I forgot about it. The site shut down and I lost traffic and visitors until I was able to update the credit card info.
The next part is hosting the domain name that you’ve chosen. Bluehost also has good rates for hosting with them and will give you your domain name for free if you decide to do so.
The 36 month plan is probably your best bet and has the lower price per month. However, if the lump sum is a bit too much for you at the moment, the 12 month plan is still a great deal as well.
Once you’re ready to pay, you’ll be led to this page…
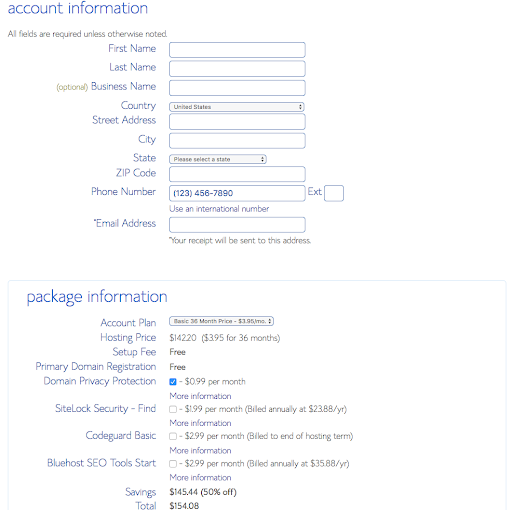
This page is pretty straightforward. Just fill out all of your basic info and move to the second section. Here, I would highly recommend adding domain privacy protection as this keeps your name and address safe and out of public view. The rest of the items are not necessary so don’t worry about those.
Next, you will be led to payment info:
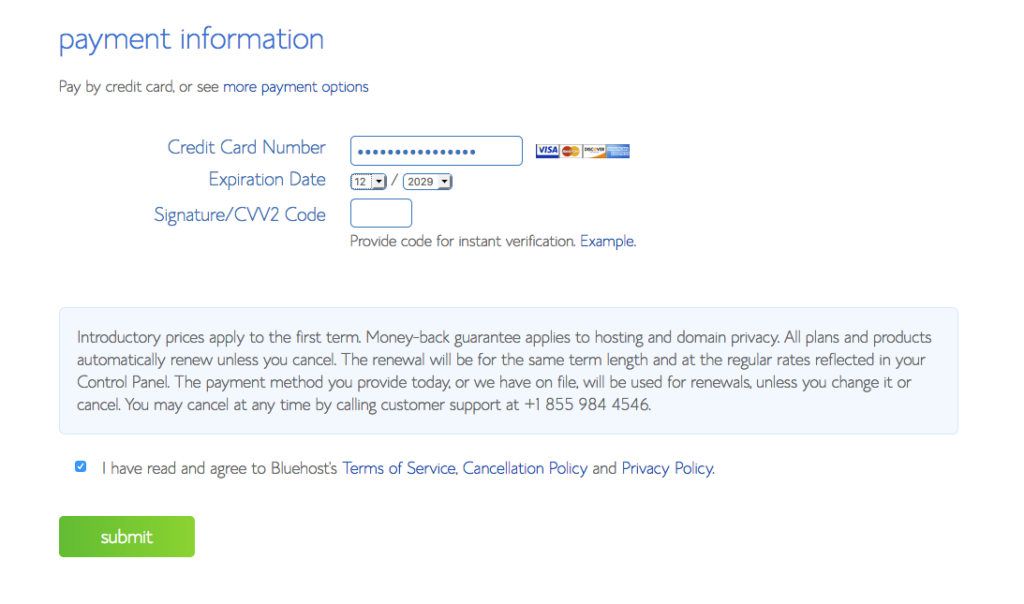
After that, you’re all set with your domain and hosting!
#2. Setting Up WordPress
There are many blogging platforms out there, but WordPress is regarded as the best for its ease of use, many plugins, and great selection of themes. We use WordPress and have been very happy with them.
Setting up WordPress with Bluehost is easy and not as hard as it sounds. There is also no additional cost at doing so.
Once you finish choosing your password, Bluehost will guide you to do exactly what you need to do. First, it will ask you to choose a theme:
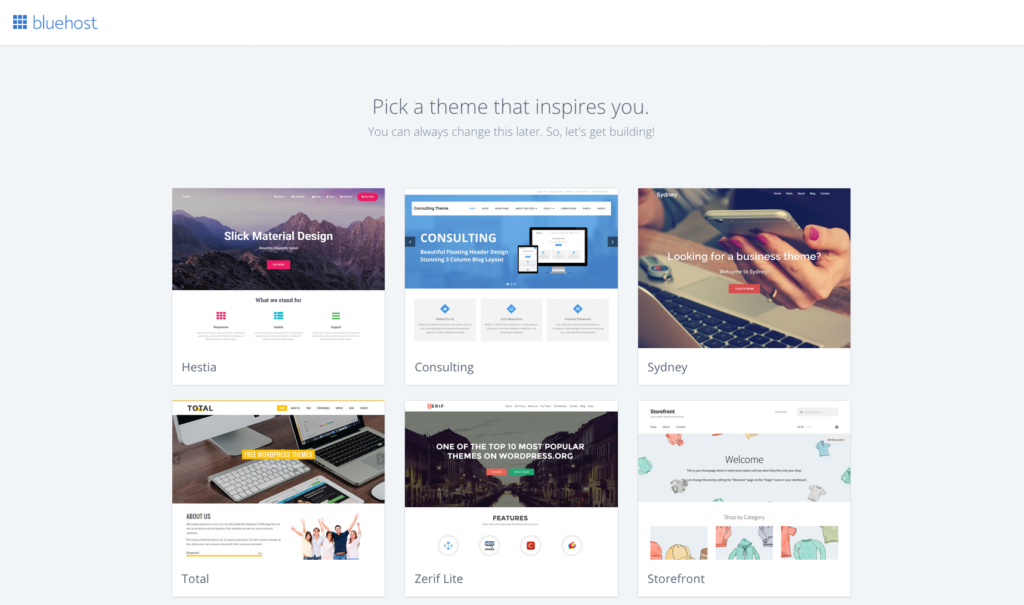
You don’t need to spend that much time on a theme yet as you can change it later. You can just choose one you really like, choose a random one, or just skip this step. You may be asked on the next screen to select if your blog is business or personal. This one is up to you.
After that, click start building and you’re all ready to go on your blog journey!
You can edit your blog by logging into Bluehost and clicking the WordPress icon. You can also do what we do and type this into the search bar:
http://www.yoursitename.com/wp-admin
This will take you to the dashboard:
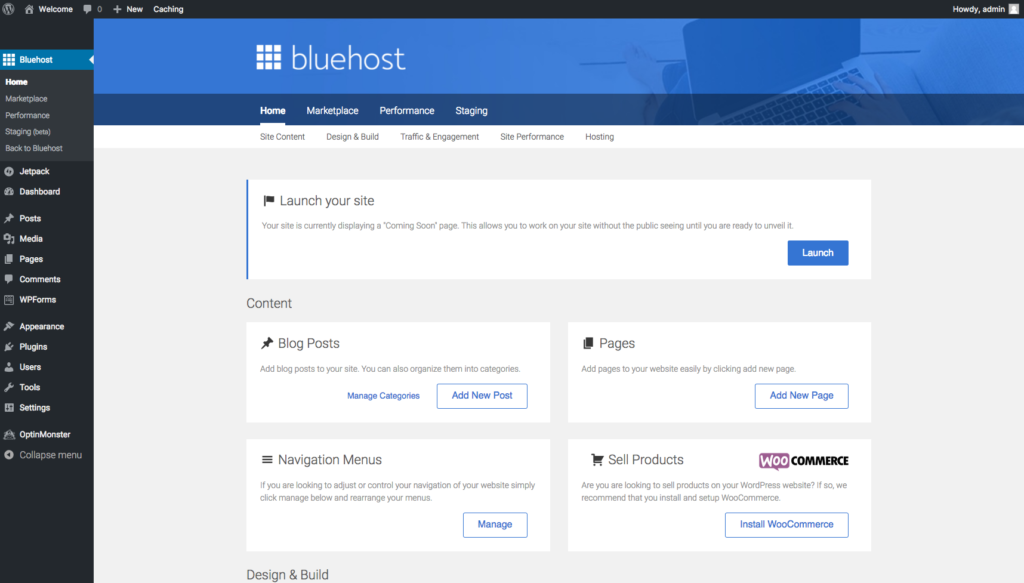
Let’s breakdown some of the menu items:
- Posts – You can add and edit posts
- Media – Add and edit images
- Appearance – If you go to the widgets section, you can add things to places like the header, footer, and sidebar
Bluehost also has a helpful WordPress guide for beginners.
#3. Themes
Last but not least, you want your site to look awesome don’t you? That’s where WordPress themes come into play. Many themes cost around $50, however, you can find a lot of themes on WordPress for free. You will also find free themes inside your WordPress dashboard.
If you have any trouble, just send us an email at domandhyo@gmail.com or just go to live chat support on the official Bluehost website.